

























































![How to Get Excellent in Animal Hospital [Roblox] |Advanced High Score Guide](/uploads/images/news/How-to-Get-Excellent-in-Animal-Hospital-Roblox-Advanced-High-Score-Guide.png)
In Roblox's Animal Hospital, your goal is not merely to survive each shift but to achieve the highest possible rating and earn the most cash rewards by the end of the round. Higher ratings mean greater income, allowing you to purchase upgrades and items more quickly. This guide covers various aspects of gameplay to help you level up your skills and consistently achieve an Excellent rating.
Choose the appropriate Class in Animal Hospital
Your choice of class directly determines your efficiency and survivability throughout the game.
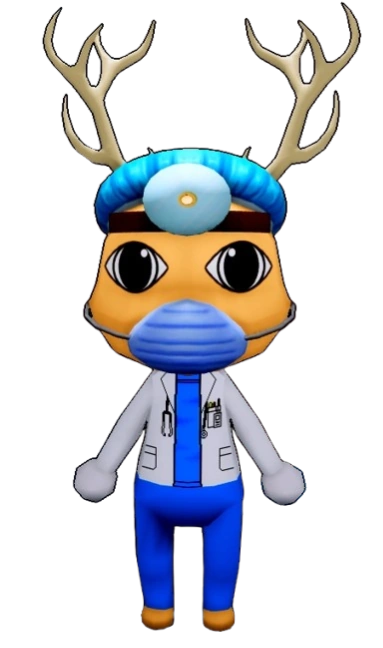
Top S-Tier Choice – Surgeon: This is the strongest class unlockable without Robux, costing 2,500 Animal Coins. Healing a patient grants a temporary boost to both Sanity and movement speed. At Level 3, you gain double Sanity per heal, an extra 10 Sanity to your maximum Sanity, and a speed boost lasting 8 seconds. For players prioritizing efficiency, this class is unrivaled—the ultimate choice for a speed-focused playstyle.

Best Budget Choice – Doctor: If you are still saving up Animal Coins, the Doctor is the safest bet. Costing 900 Animal Coins, it is affordable after just a short period of saving. Healing patients restores Sanity—with higher levels providing greater restoration—keeping you stable throughout the shift so you don't have to constantly run back to the coffee machine.

High Risk, High Reward – Psychologist: Costing 500 Animal Coins, this class starts with 100% Sanity, but the trade-off is that all Sanity fluctuations (whether gains or losses) are doubled. It puts your skills to the ultimate test; while the rewards for perfect play are incredible, a single mistake can lead to a total collapse.

Best Item-Focused Choice – Secret Agent: A premium class costing 890 Robux that starts with a gun. At Level 3, the gun regenerates one bullet per round. If you are frequently troubled by anomalies, this class significantly boosts your survival rate. Note that this is currently the most expensive class in the game, so consider your purchase carefully.
Accumulating enough Animal Coins takes considerable time and effort. If you want to quickly purchase powerful classes like the Surgeon, you can visit the Animal Hospital shop for a quick top-up—offering great prices and a convenient purchasing process.
Also Read: Secret Agent vs Head Nurse in Animal Hospital: Which Classes Should You Choose?
Identifying Patients
Distinguishing between real patients and anomalies at the reception desk is the most critical step. Successfully identifying and rejecting anomalies not only ensures hospital safety but also directly boosts your rating. Memorize the standard four-step inspection method to help you screen for—and weed out—almost every type of anomaly.
Step 1: Visual Inspection:

Scan the patient from head to toe as they approach the front desk. Visual signs of an anomaly include: three eyes, hollow eye sockets, sharp teeth, teeth that look too realistic, an exaggerated smile, or twitching. If you spot any of these, immediately press the Shutters button on the left to reject the patient.
Step 2: Surveillance Check:
If the visual inspection is clear, check the security camera feed. Anomalies may appear as: black squares over the eyes, severely distorted or elongated limbs, a pitch-black body, staring directly into the camera, twitching, or the camera automatically zooming in on a black silhouette.
Note: Allowing the camera to zoom in on a black silhouette drains Sanity; failing to look away in time can be fatal.
Step 3: Photo Comparison:
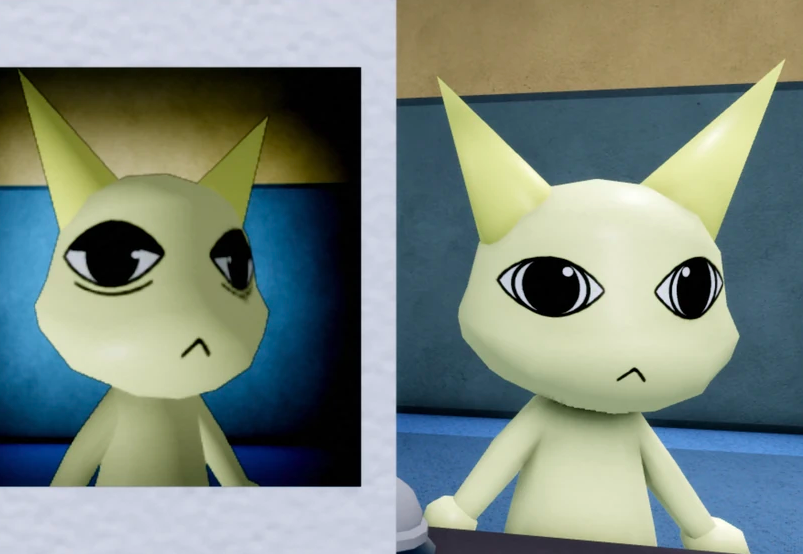
If the first two checks pass, take a photo of the patient. The photo might reveal issues missed by the naked eye and surveillance—such as the photo not matching the patient's actual appearance (mismatched eyes, ears, mouth, etc.) or the image appearing static-filled or grainy.
Step 4: Document Verification:
Check that the appointment details match—verify the name, species, and appointment time.
Tips: It is better to mistakenly reject a patient than to mistakenly admit one. There is no penalty for rejecting a patient during early shifts, but admitting a single Anomaly allows it to transform into a Skinwalker, threatening the entire floor. Reject the patient immediately if you are unsure about anything.
Also Read: Animal Hospital [Roblox] Beginner Guide (2026)
Treatment Process
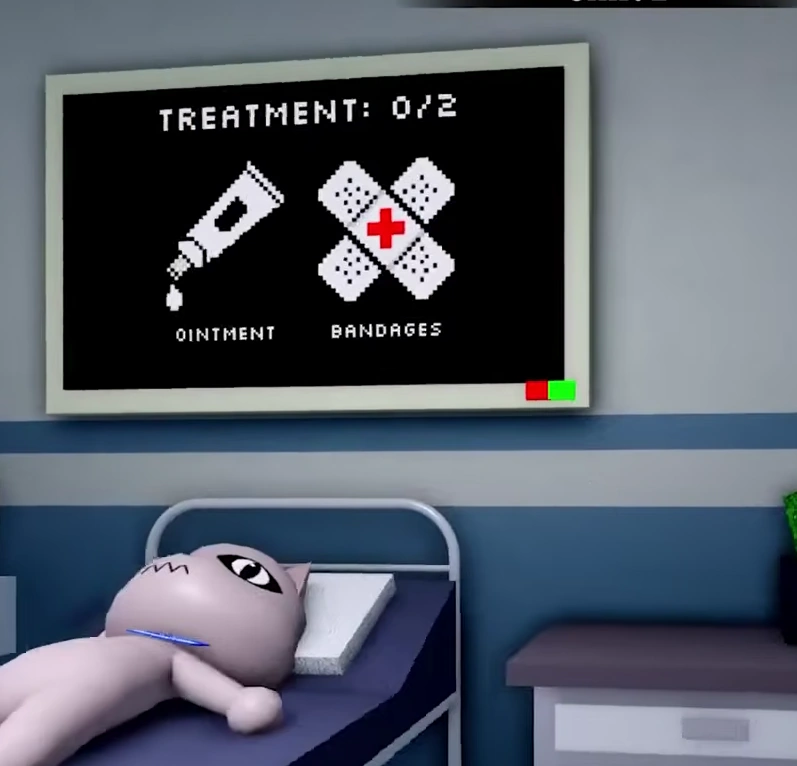
Patients who pass inspection proceed to the treatment phase. The efficiency of this phase determines how many patients you can treat, which in turn affects your score.
Standard Treatment Procedure
- Enter the patient's room and collect a DNA sample.
- Insert the sample into the DNA analyzer and wait about 10 seconds for the results.
- Check the computer to confirm which treatment item the patient requires.
- Retrieve the corresponding item from the shelves outside the room.
- Return to the room, use the treatment item, and wait for the patient to recover.
Quick Reference: Common Treatment Items
- Headache → Herbs
- Stomachache → Medicine
- Fever → Thermometer
- Bleeding → Bandages
- Burns/Rash → Ointment
- Flu → Cough Syrup
- Low Blood Sugar → Maple Syrup
- Dry Eyes → IV Drops
Shelves are color-coded; once you memorize the locations, retrieving items takes only a few seconds.
Advanced Efficiency Tips
- · Batch processing patients. Examine and admit all patients to their rooms first, then treat them all at once. This avoids wasting time running back and forth.
- · Make use of the time spent waiting for DNA analysis. During the 10-second analysis period, attend to patients in the next room or examine new arrivals.
- · Memorize the trigger points for emergencies. Emergencies begin appearing in Shift 3 and become more frequent as the game progresses; be mentally prepared.
- · Prioritize upgrading DNA analysis speed. The 50% Faster DNA Analysis upgrade is one of the most cost-effective investments you can make.
Handling Emergencies
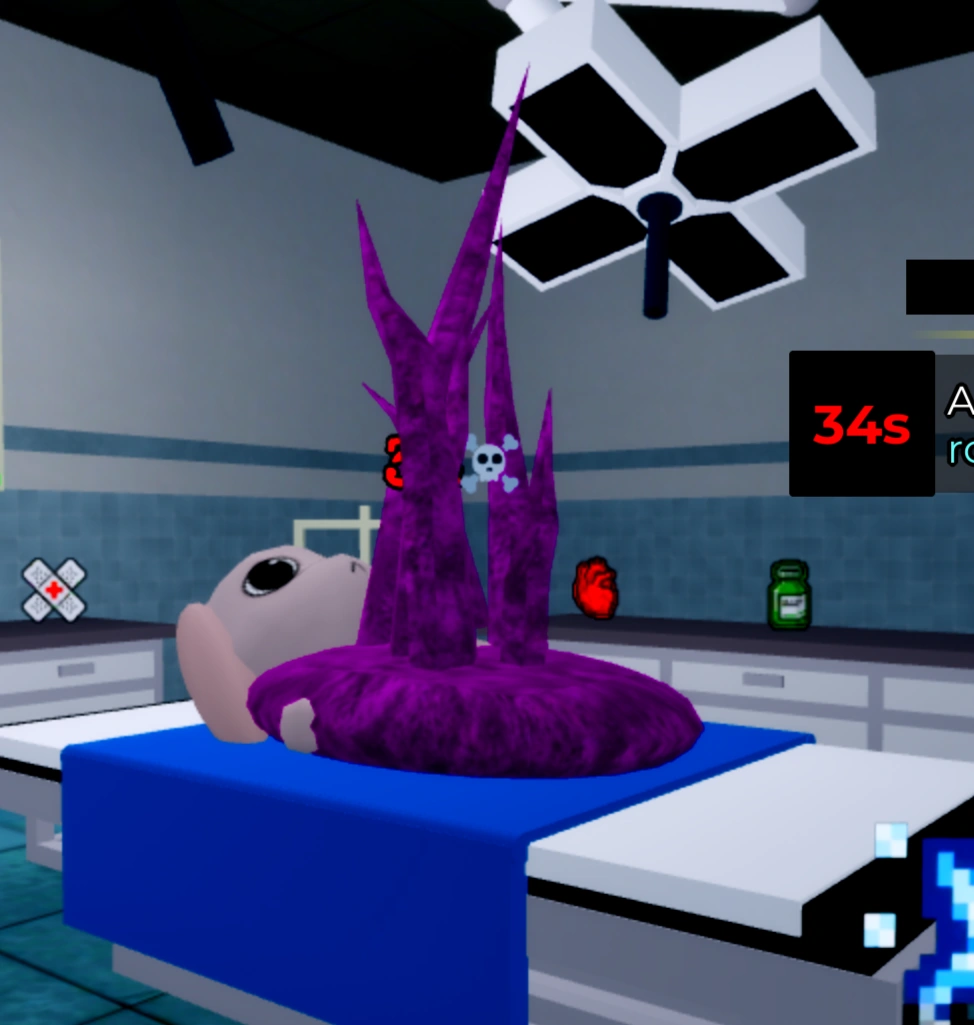
Starting from Shift 3, emergencies can disrupt your workflow at any moment. Mishandling them not only costs points but can also lead to patient deaths—if three patients die in the hospital, you fail the shift immediately.
Ambulance Event:
You must complete the full diagnosis and treatment process for the patient within 100 to 120 seconds. Time is tight, so you must work at full speed.
Fire in room:
Using a fire extinguisher is the fastest and safest method. Extinguishers are located near the examination tables. If left unchecked, the fire will continuously drain your Sanity.
Monster emerging:
A massive cluster of purple tentacles appears randomly in Room 8, with a 45-second cooldown. You must complete the surgery before the timer runs out, or the patient will die.
Note: Attacking the tentacles with a Taser or gun will instantly kill the patient.
Beyond the events listed above, there are other types of emergencies; players can experiment to find the best strategies to overcome these challenges.
Sanity Management
Sanity acts as your health bar; if it drops to zero, the game ends. Be sure to remember the following ways to restore Sanity:
- Coffee: Drinking coffee restores 5 Sanity points per sip, with a maximum of three sips per machine. It is recommended to drink before your Sanity drops to 50%, rather than waiting until it is nearly depleted.
- Treating patients: Depending on your class, curing patients restores Sanity. The Surgeon excels in this regard.
- Chocolate: Keep a bar of chocolate in reserve to counter unavoidable Sanity loss (such as being hit by a cursed photo).
Common Hazards
- Stalker: A tall, black, rabbit-like figure that appears in corners. Looking directly at it causes a loss of 10 Sanity points.
- Don't Look Up: An amalgamation of eyes and flesh on the ceiling. Looking up at it causes it to grow rapidly and inflict Sanity damage.
- Bed Monster: Appears in a red, translucent zone beneath a patient's bed. Stepping into it results in being grabbed and losing Sanity. Holding maple syrup before entering the red zone causes the monster to retreat automatically.
Common Point Deductions
- Administering the wrong medication: Never use the incorrect treatment item; doing so leads to serious consequences.
- Searching for treatment items in the shop: This is the most common mistake made by beginners. Treatment items are located on shelves outside the patient rooms; they are free and do not need to be purchased.
- Neglecting Sanity management: Low Sanity not only makes you vulnerable to sudden death but also affects your final score and rewards.
- Trying to tough it out solo: The game supports teams of up to four players. Teaming up not only distributes the workload, but the Teddy Bear can also revive fallen teammates.
Final Thoughts
Every successful Anomaly rejection, every patient cured, and every emergency handled perfectly boosts your final score. Internalize these actions into muscle memory, and achieving a perfect score will no longer be just a dream.